How To Create A Watch Folder
What Is A Watch Folder:
A watch folder is a directory that's specified to be polled periodically by our encoding platform for new content. When new content arrives, the system will fetch the file and convert it to the video format you have requested within the Watch Folder. Watch folders are an alternative to integrating with our API and requires nothing more than a local or cloud storage location to use. Simply login to our user interface, click on the Watch Folder tab in the UI and specify four things.
- A local or cloud storage location for our system to “watch” for new source video files
- Choose the video format output of your choice (MP4, WebM, HLS, DASH, etc)
- A frequency of how often the source location should be polled (from every 5 minutes to once a 1 day)
- A destination location(s) where you would like us to send the output files.
After you login to Encoding.com, find the Watch Folder section on the left side of your user interface. Follow the steps below to create a Watch Folder.
Once on the Watch Folder page, click the + symbol next to "Add New Watch Folder"
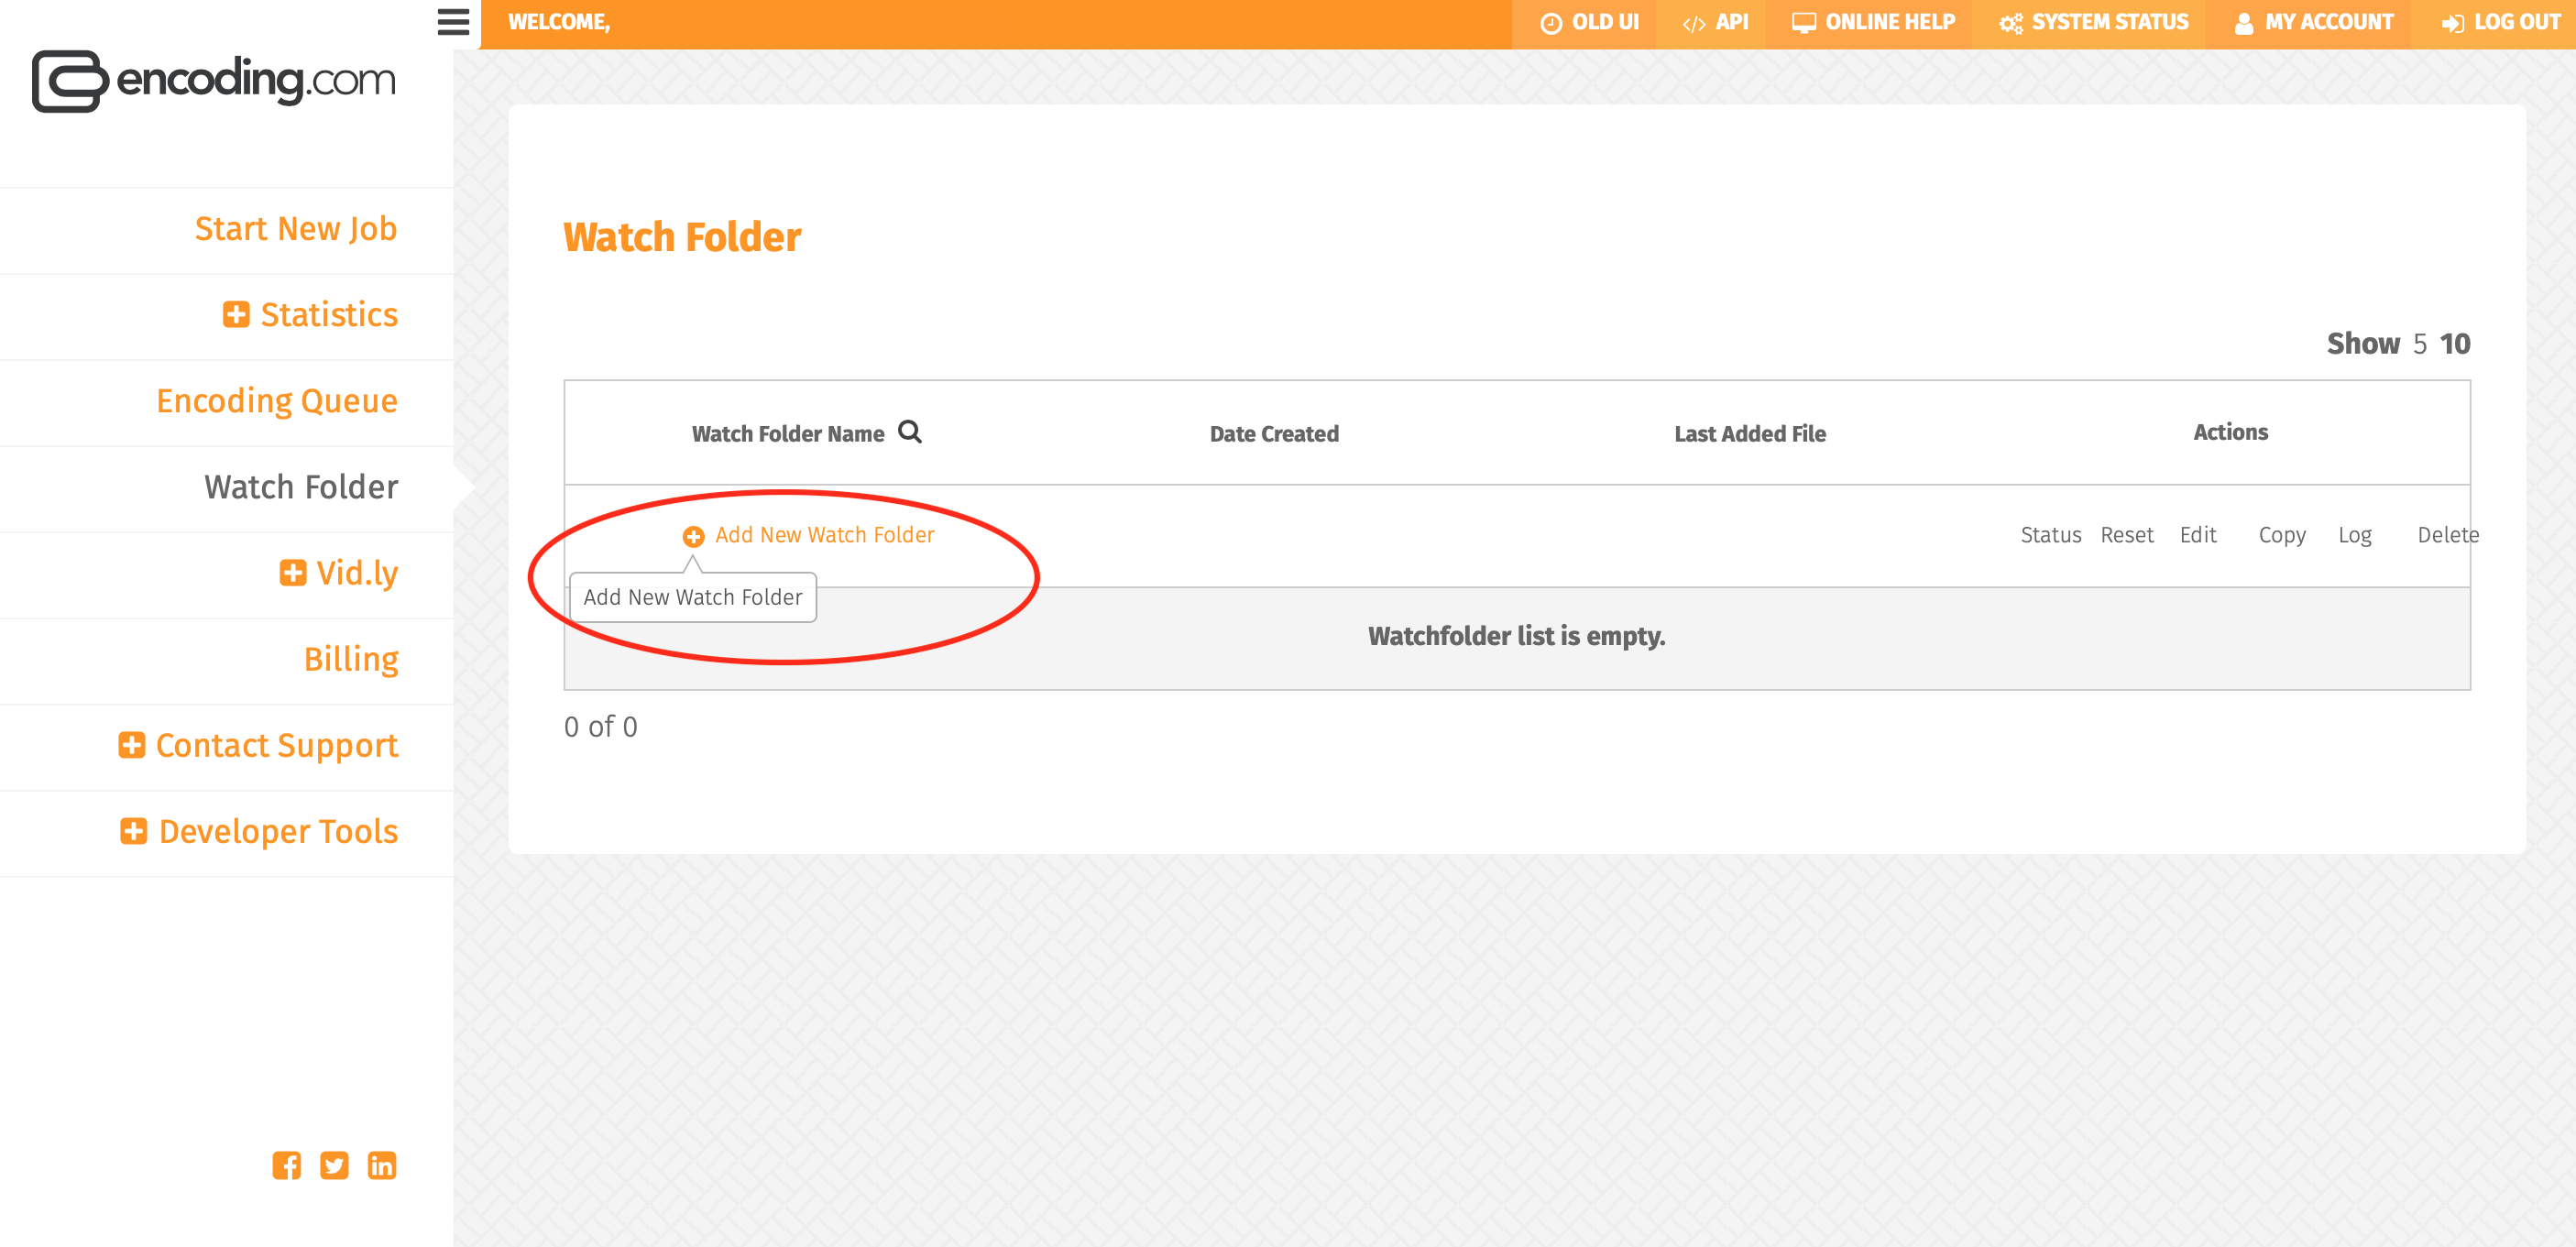
Step One:
Next, you will want to define the source directory location the Watch Folder will need to watch for processing. This can be found under the "Setup your Watch Folder" tab in the Add New Watch Folder Window. In the "Point us to your source folder" field, you can define the local or cloud storage location of where your source files are being stored. This can be FTP, SFTP, Amazon S3, Rackspace, NetApp, Azure, OpenStack, or HTTP location. After defining the source location for encoding.com to watch, then click the "Start" button.
Also, you can use RSA private key for SFTP authentication. To add a private key for you host use SetHostKey API request and then you will only need to specify username and hostname in the WatchFolder settings.
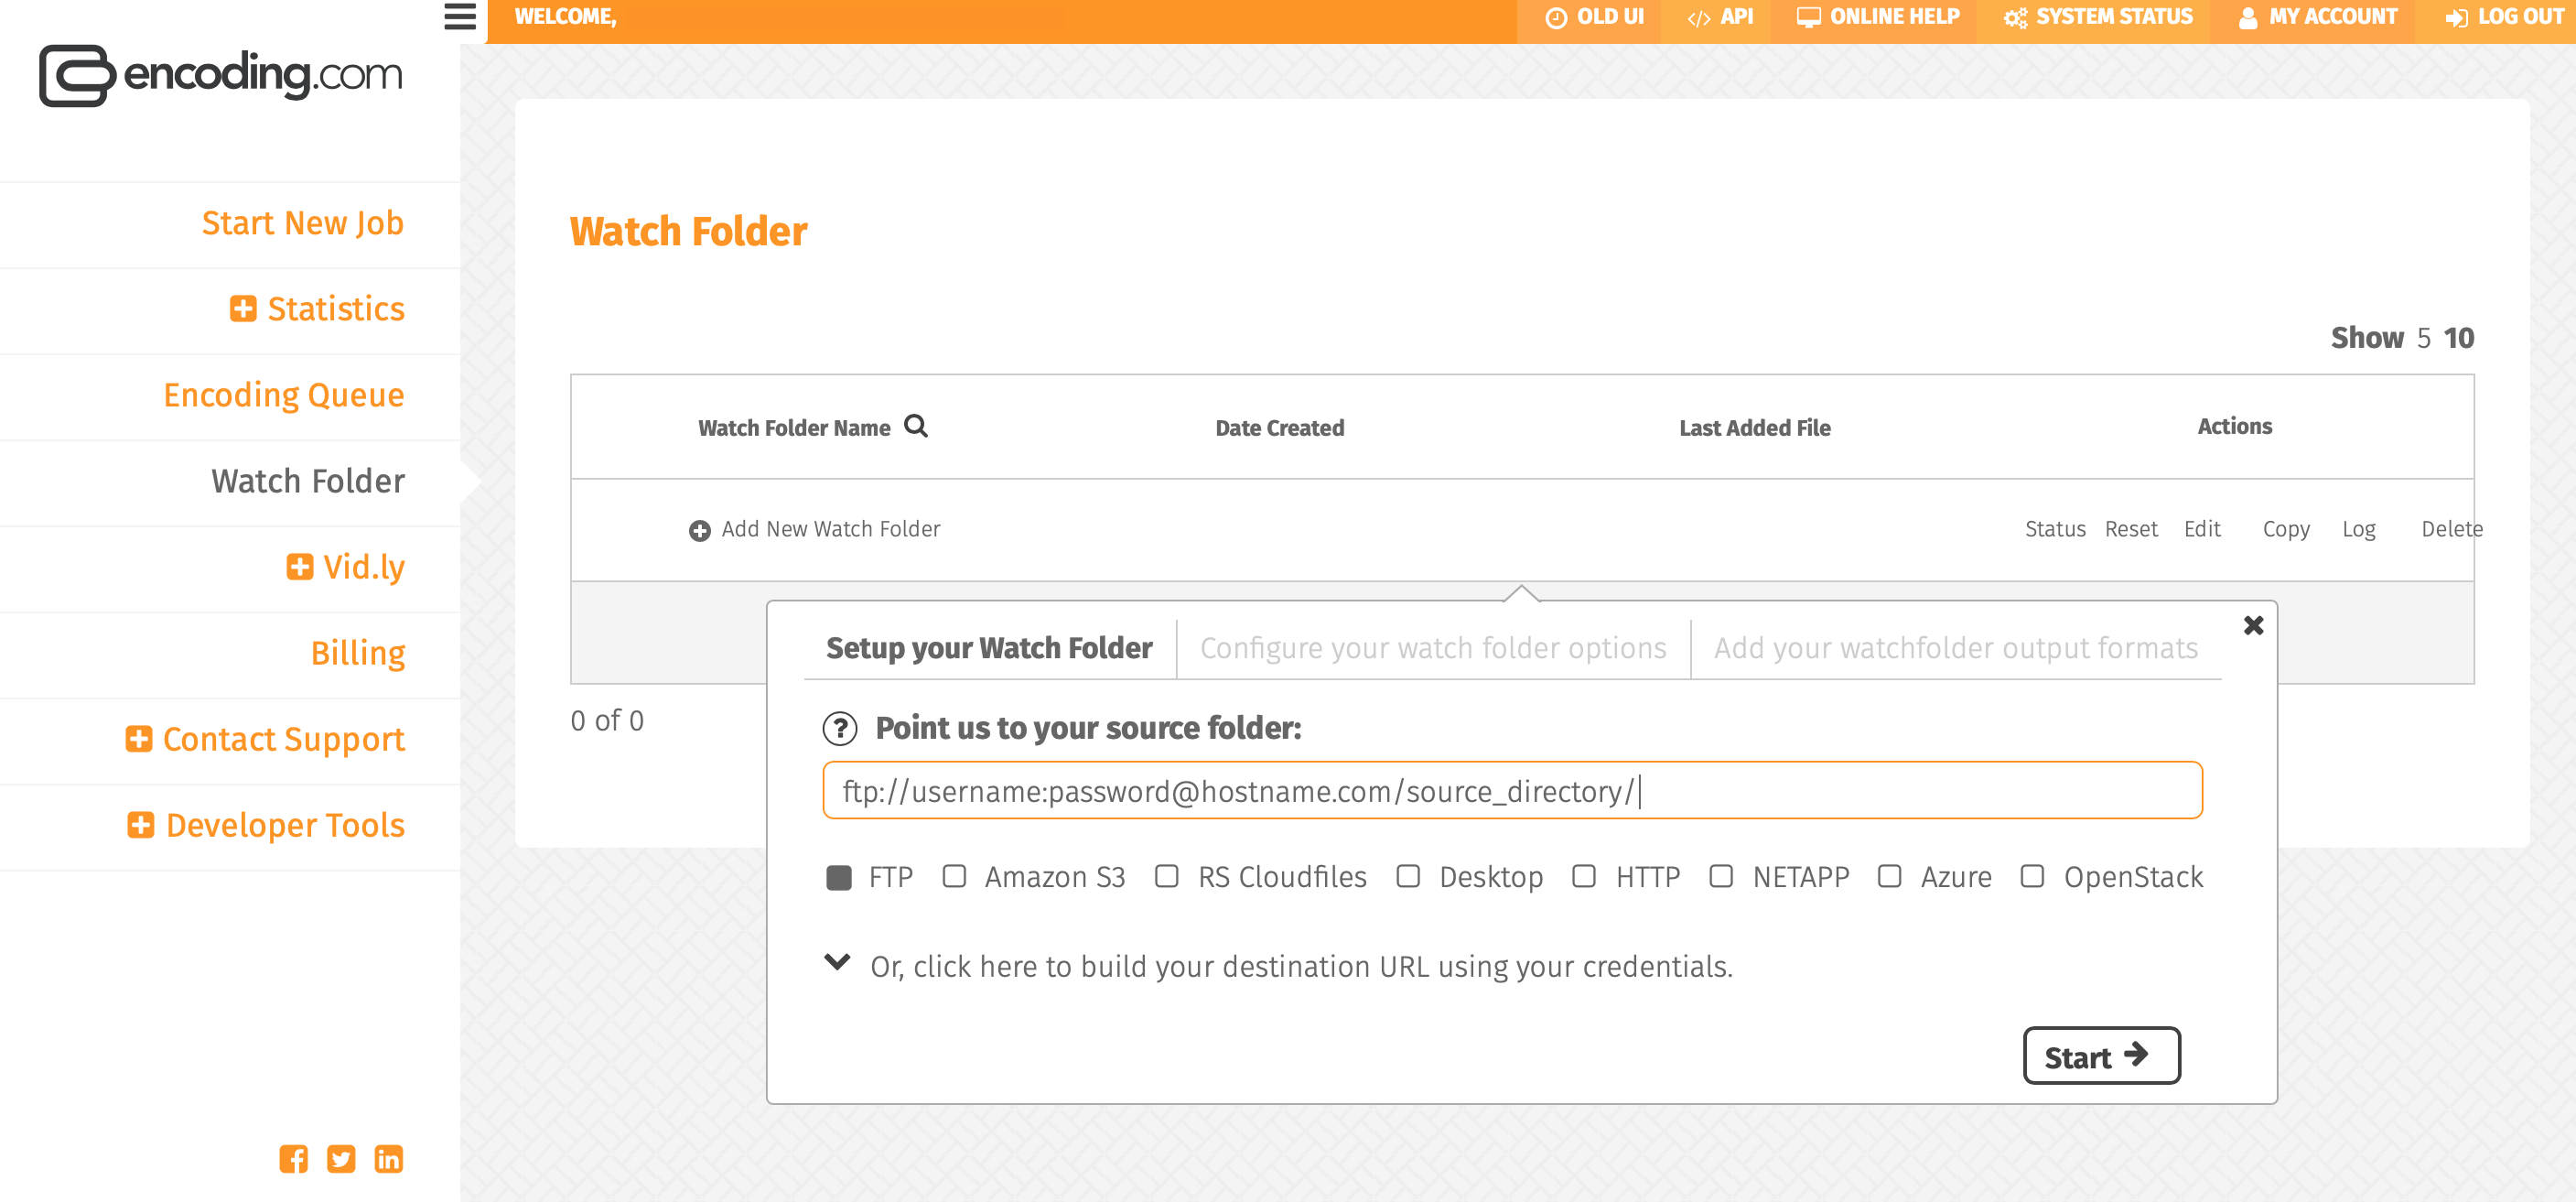
Step Two:
This will take you to the second tab in the Watch Folder set-up window, "Configure Your Watch Folder Options". Here within the second tab there are a number of options you can set for this specific Watch Folder.
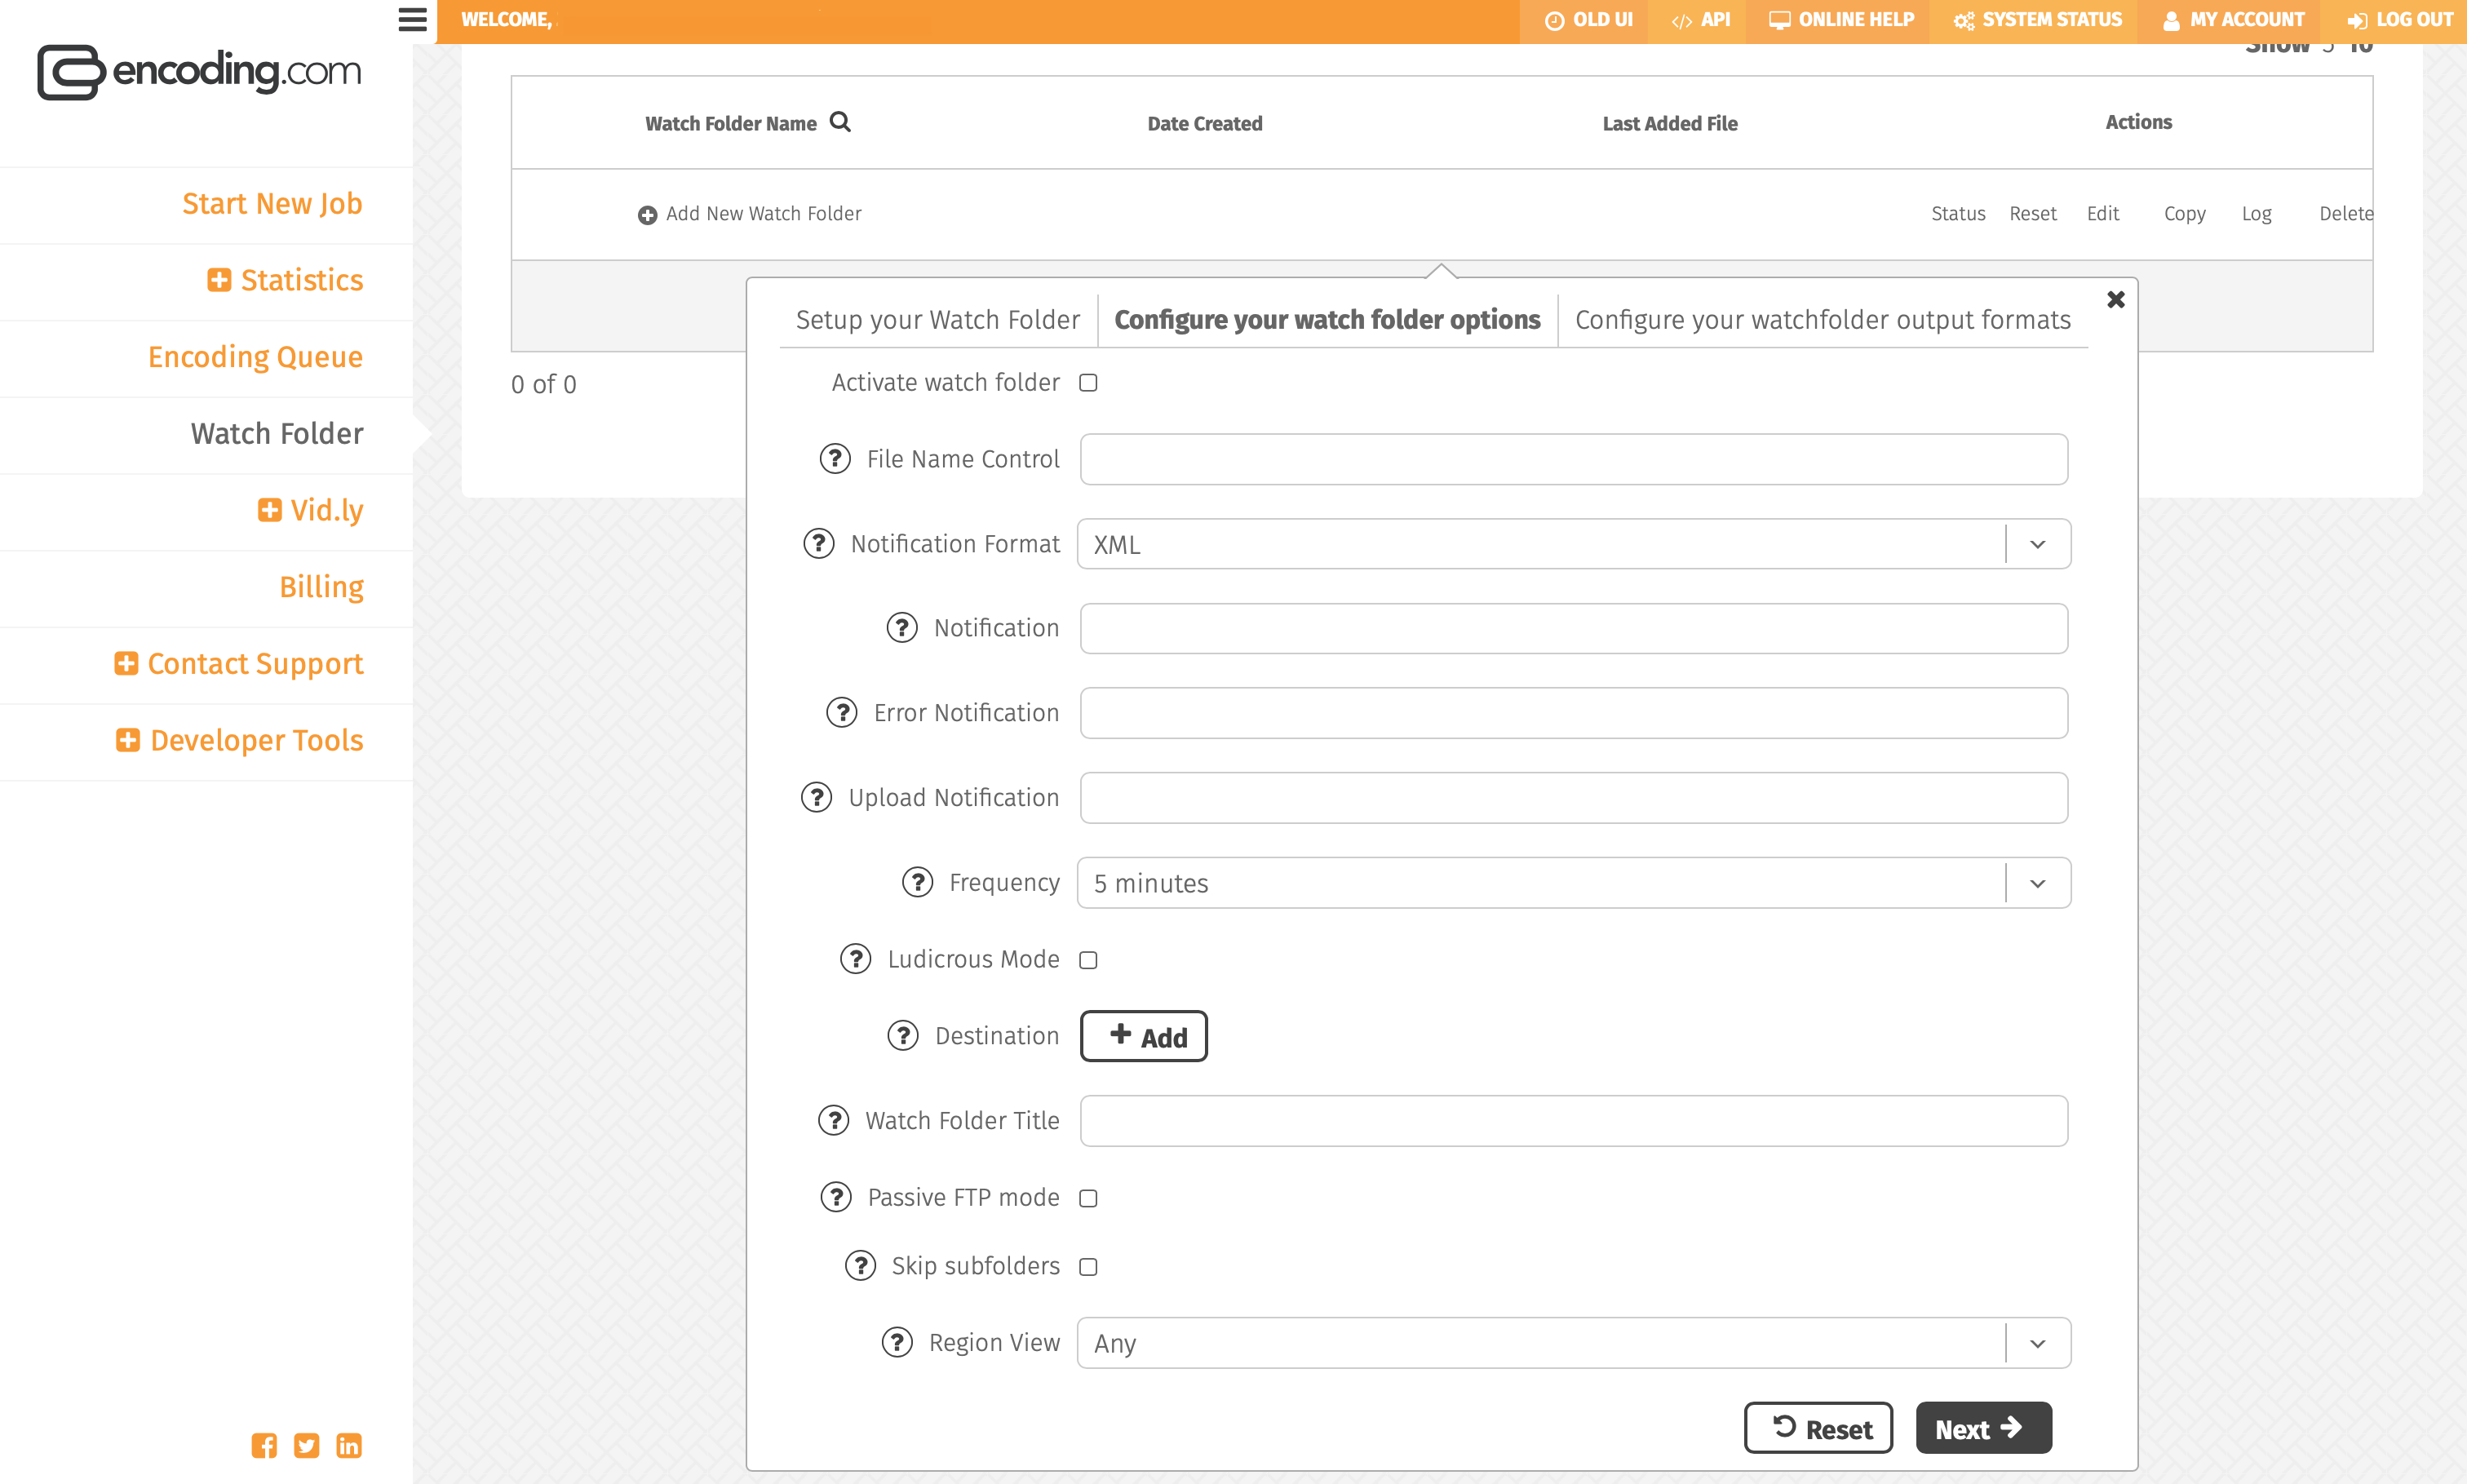
Let's go through each option within the second tab of the Watch Folder set-up:
Activate Watch Folder - Tick this box to make the Watch Folder active. Be sure to read our best practices below about activating and resetting Watch Folders.
File Name Control - Comma separated list of masks. This mask allows you to process only appropriate files in the Watch Folder source directory. For example, a Watch Folder with a Mask of ' .mp4,.mov' will process only files with .mp4 and .mov extensions, and will ignore all other file formats in the source directory being watched.
Notification Format - Chose notification request format (XML or JSON). This dropdown menu will determine the format of how your job notifications are delivered to your notification URL.
Notification - Let us know how you would like to be notified when the Watch Folder jobs is completed. You can enter either a valid email address or the http URL of a listening script in which we will send XML or JSON when the job has completed.
Error Notification - Like the Notification Field above, the Error Notification field can be used for receiving notifications when a job kicks out an error. You can enter either a valid email address or the http URL of a listening script in which we will send XML or JSON when the job encountered an error.
Upload Notification - This notification field will let you know when your output(s) have been uploaded to the destination(s) defined within the Watch Folder. You can enter either a valid email address or the http URL of a listening script in which we will send XML or JSON when the output(s) have been uploaded to the desired destination(s).
Frequency - This dropdown menu will define how often we check the source directory for new source files that need to be processed. Our system will use the time stamp of the file to determine if it is new media file. This can be as frequent as every 5 minutes or less frequently at just once a day. There are other intervals within the dropdown that can be selected to best fit your frequency requirements.
Ludicrous Mode - Turn on advanced split and stitch processing architecture. Please note, using Ludicrous Mode will incur additional transcoding costs.
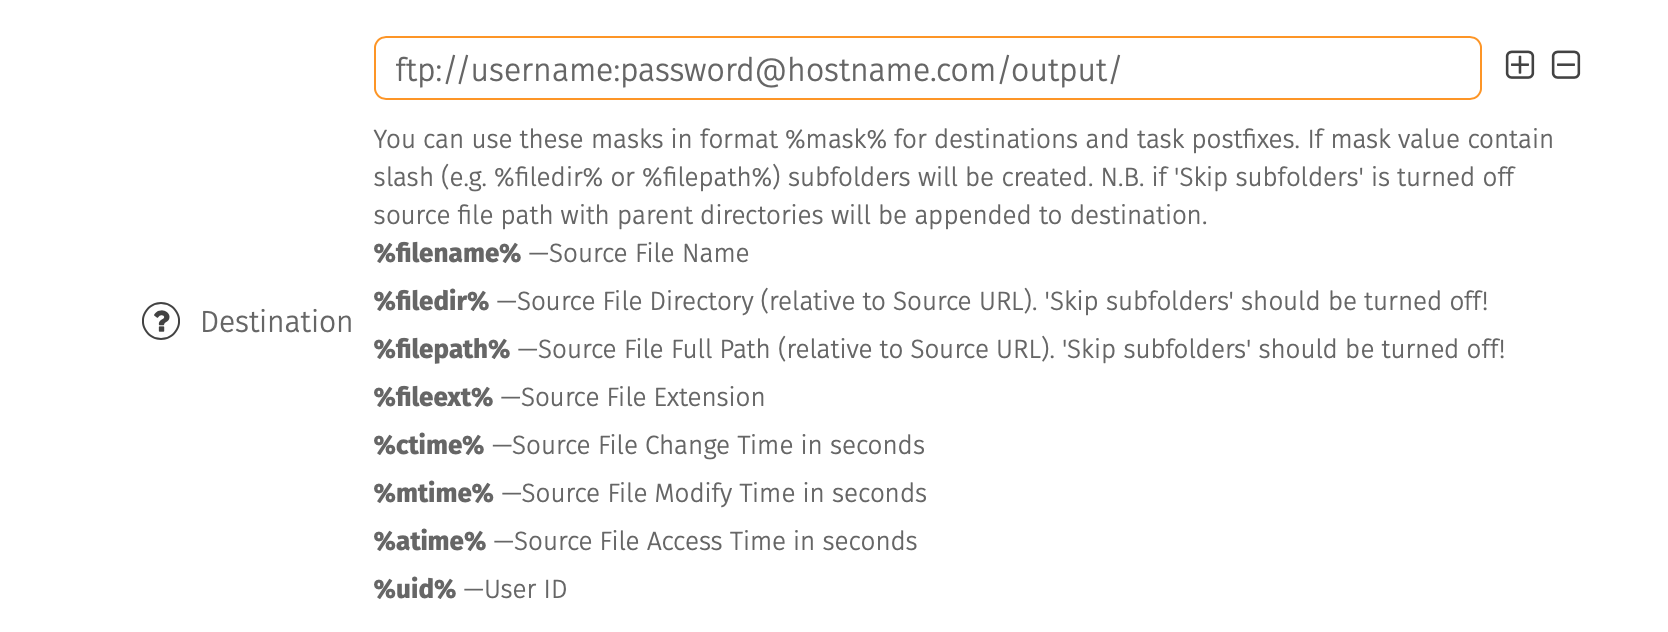
Destination - You can click the "+Add" button to define the destination location of where the output(s) should be sent once processing has completed. We can send converted media files to a publicly available FTP/SFTP location, Amazon S3 or Cloud files storage. Please check your complete destination media path, username, password and permissions prior to adding it to your Watch Folder.
Additionally, you use specific Masks for destinations and task postfixes. If mask value contain slash (e.g. %filedir% or %filepath%) subfolders will be created.
Watch Folder Title - Please name your watch folder so it can be easily remembered by your team. This is especially helpful if you have more than one Watch Folder in your account.
Passive FTP mode - Check this box if your FTP server is operating in Passive Mode. Most FTP servers behind corporate firewall only support passive FTP mode. A 425 "Can't open data connection" error will be returned if we check a FTP location that only supports passive FTP mode and this box is not checked.
Skip subfolders - Check this box if you want the Watch Folder to skip subfolders in source directory folder.
Region View - Within this dropdown menu you can specify the region of where your files will be processed. We recommend choosing a region that is closet to where your source files reside. By default, if you're using Amazon S3 as a source location, we will process in that same data center. If Amazon S3 is your source location the Watch Folder is watching, you do not need to set the region in this dropdown menu.
Step Three:
The third and final step of setting up your Watch Folder is defining the output(s) that need to be created from your source files. This is done in the third tab labeled, "Configure Your Watch Folder Output Formats". You can use the dropdown menu in this tab to choose one of the pre-defined formats we have available, or you can select "Custom Format" from this drop down menu to pick another desired output format. If you have previously set-up Output Presets in your account, you can select, "Your Own Presets" in this dropdown menu to choose account-specific presets.
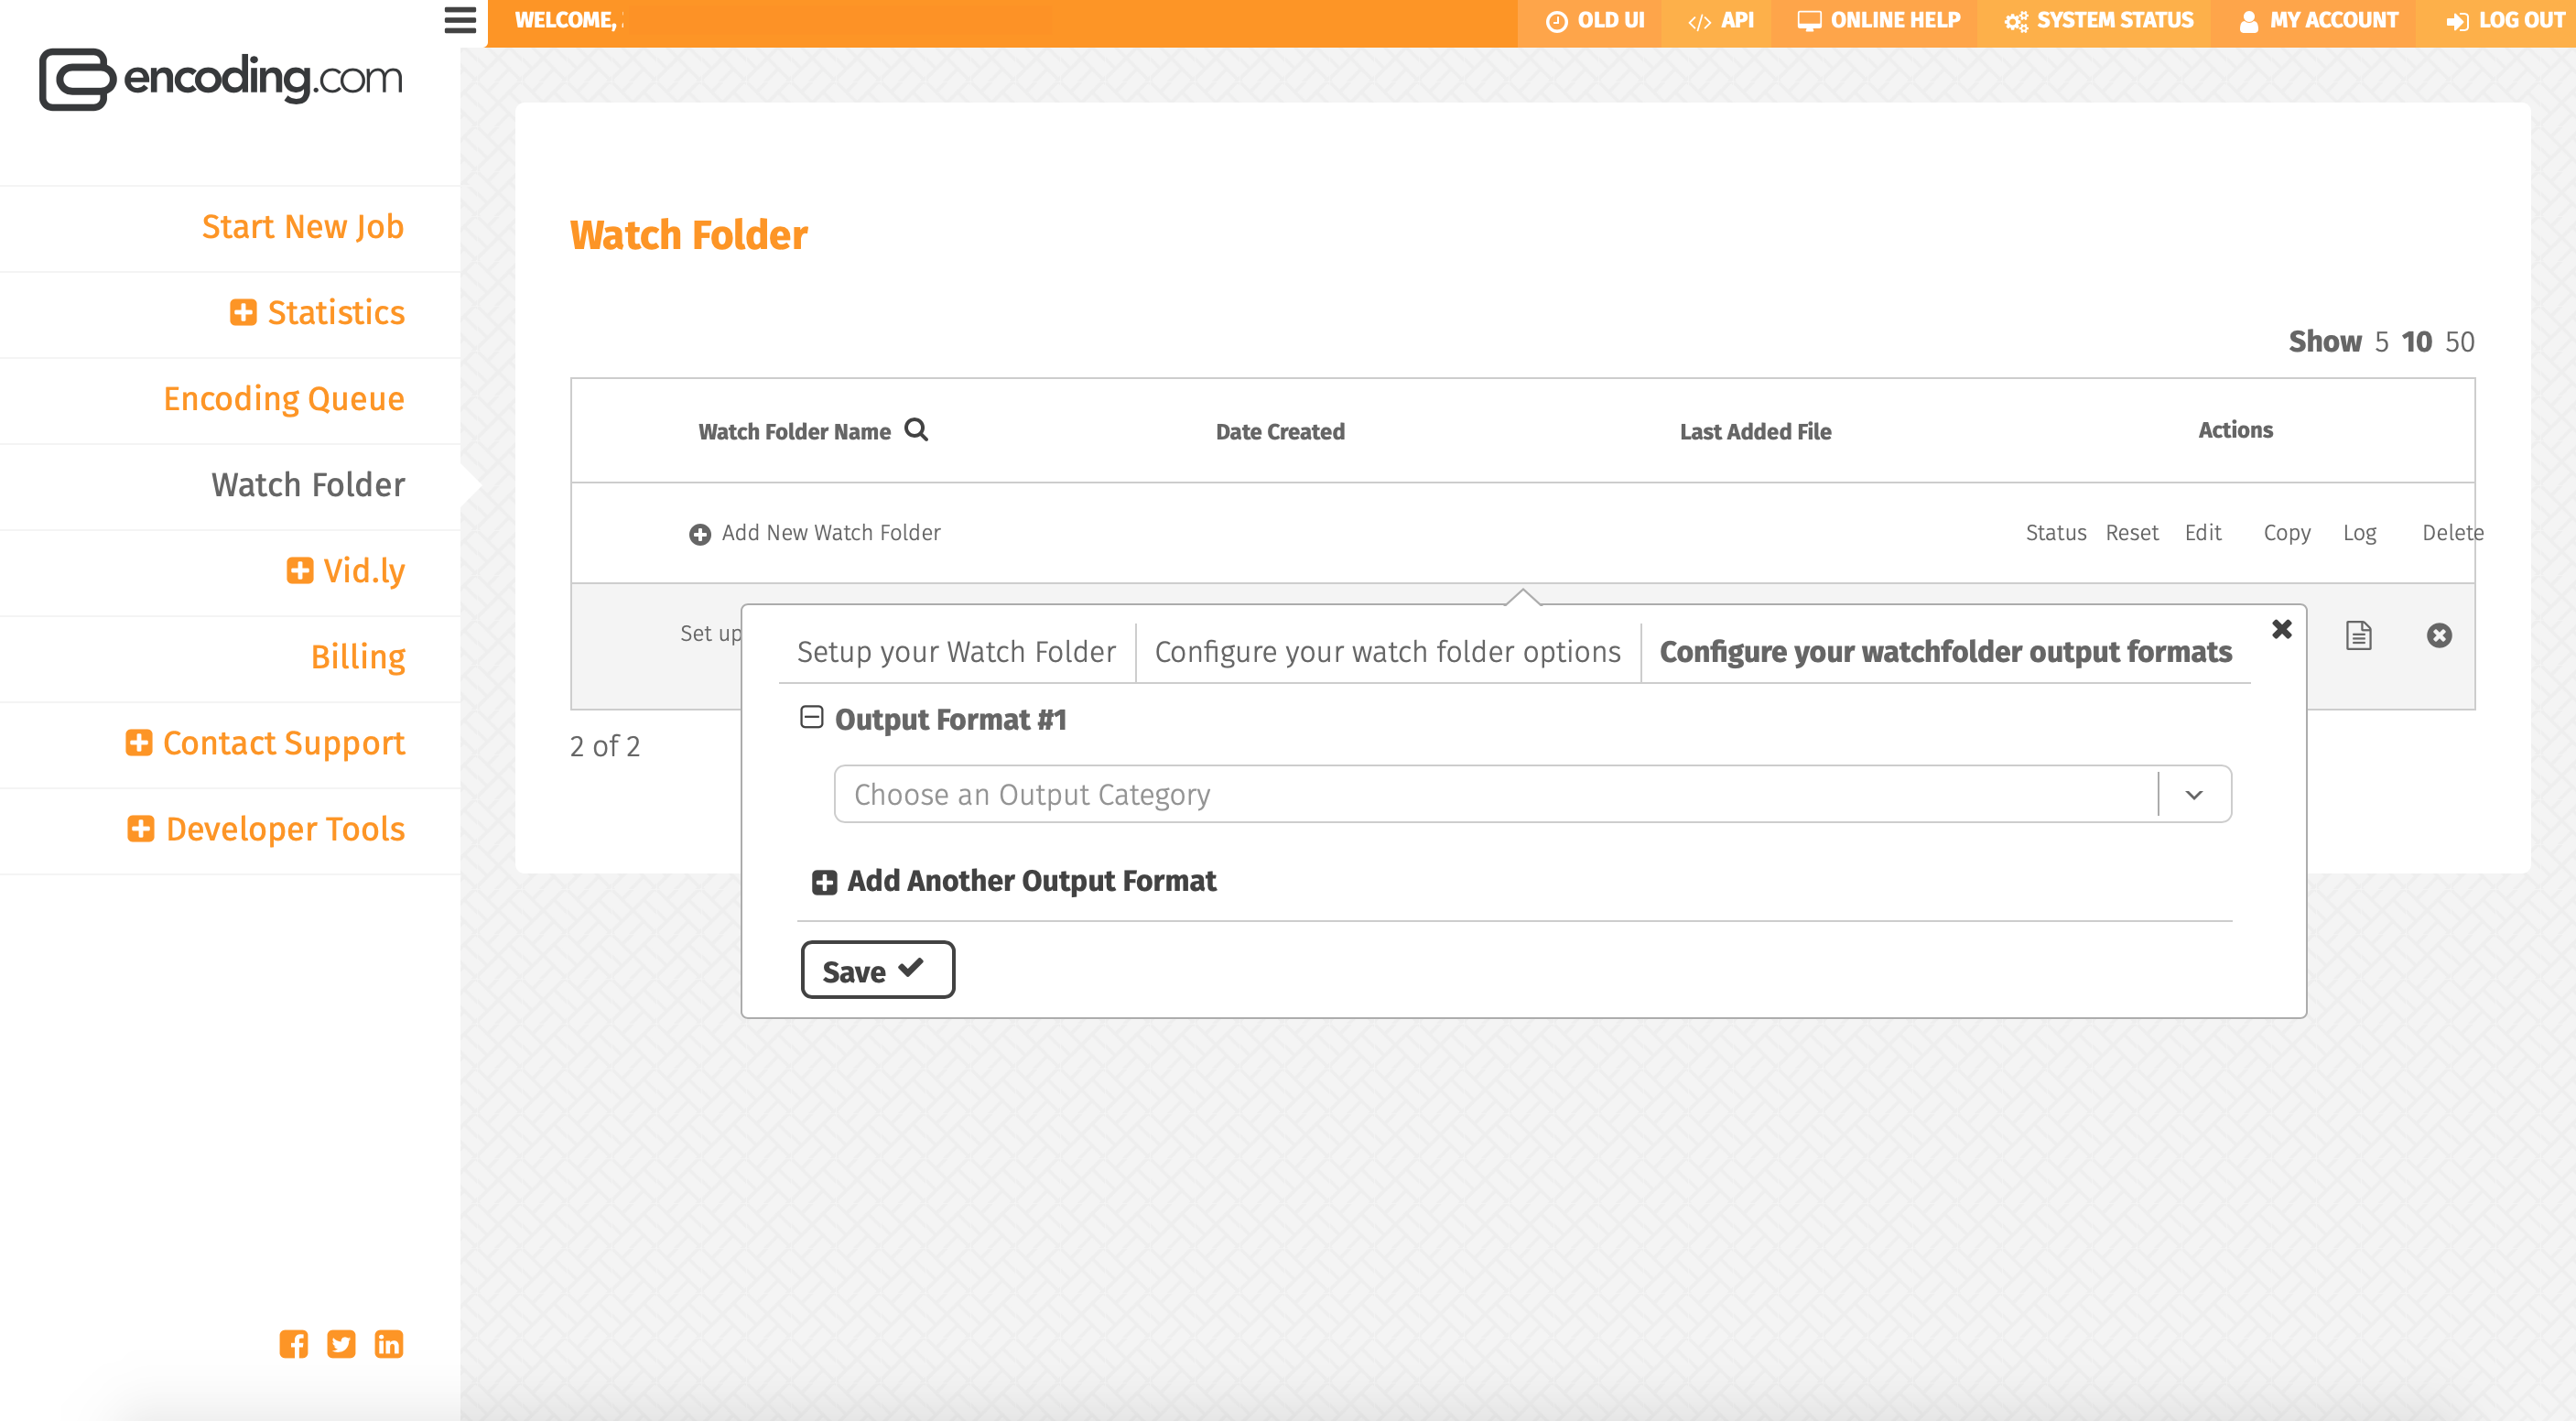
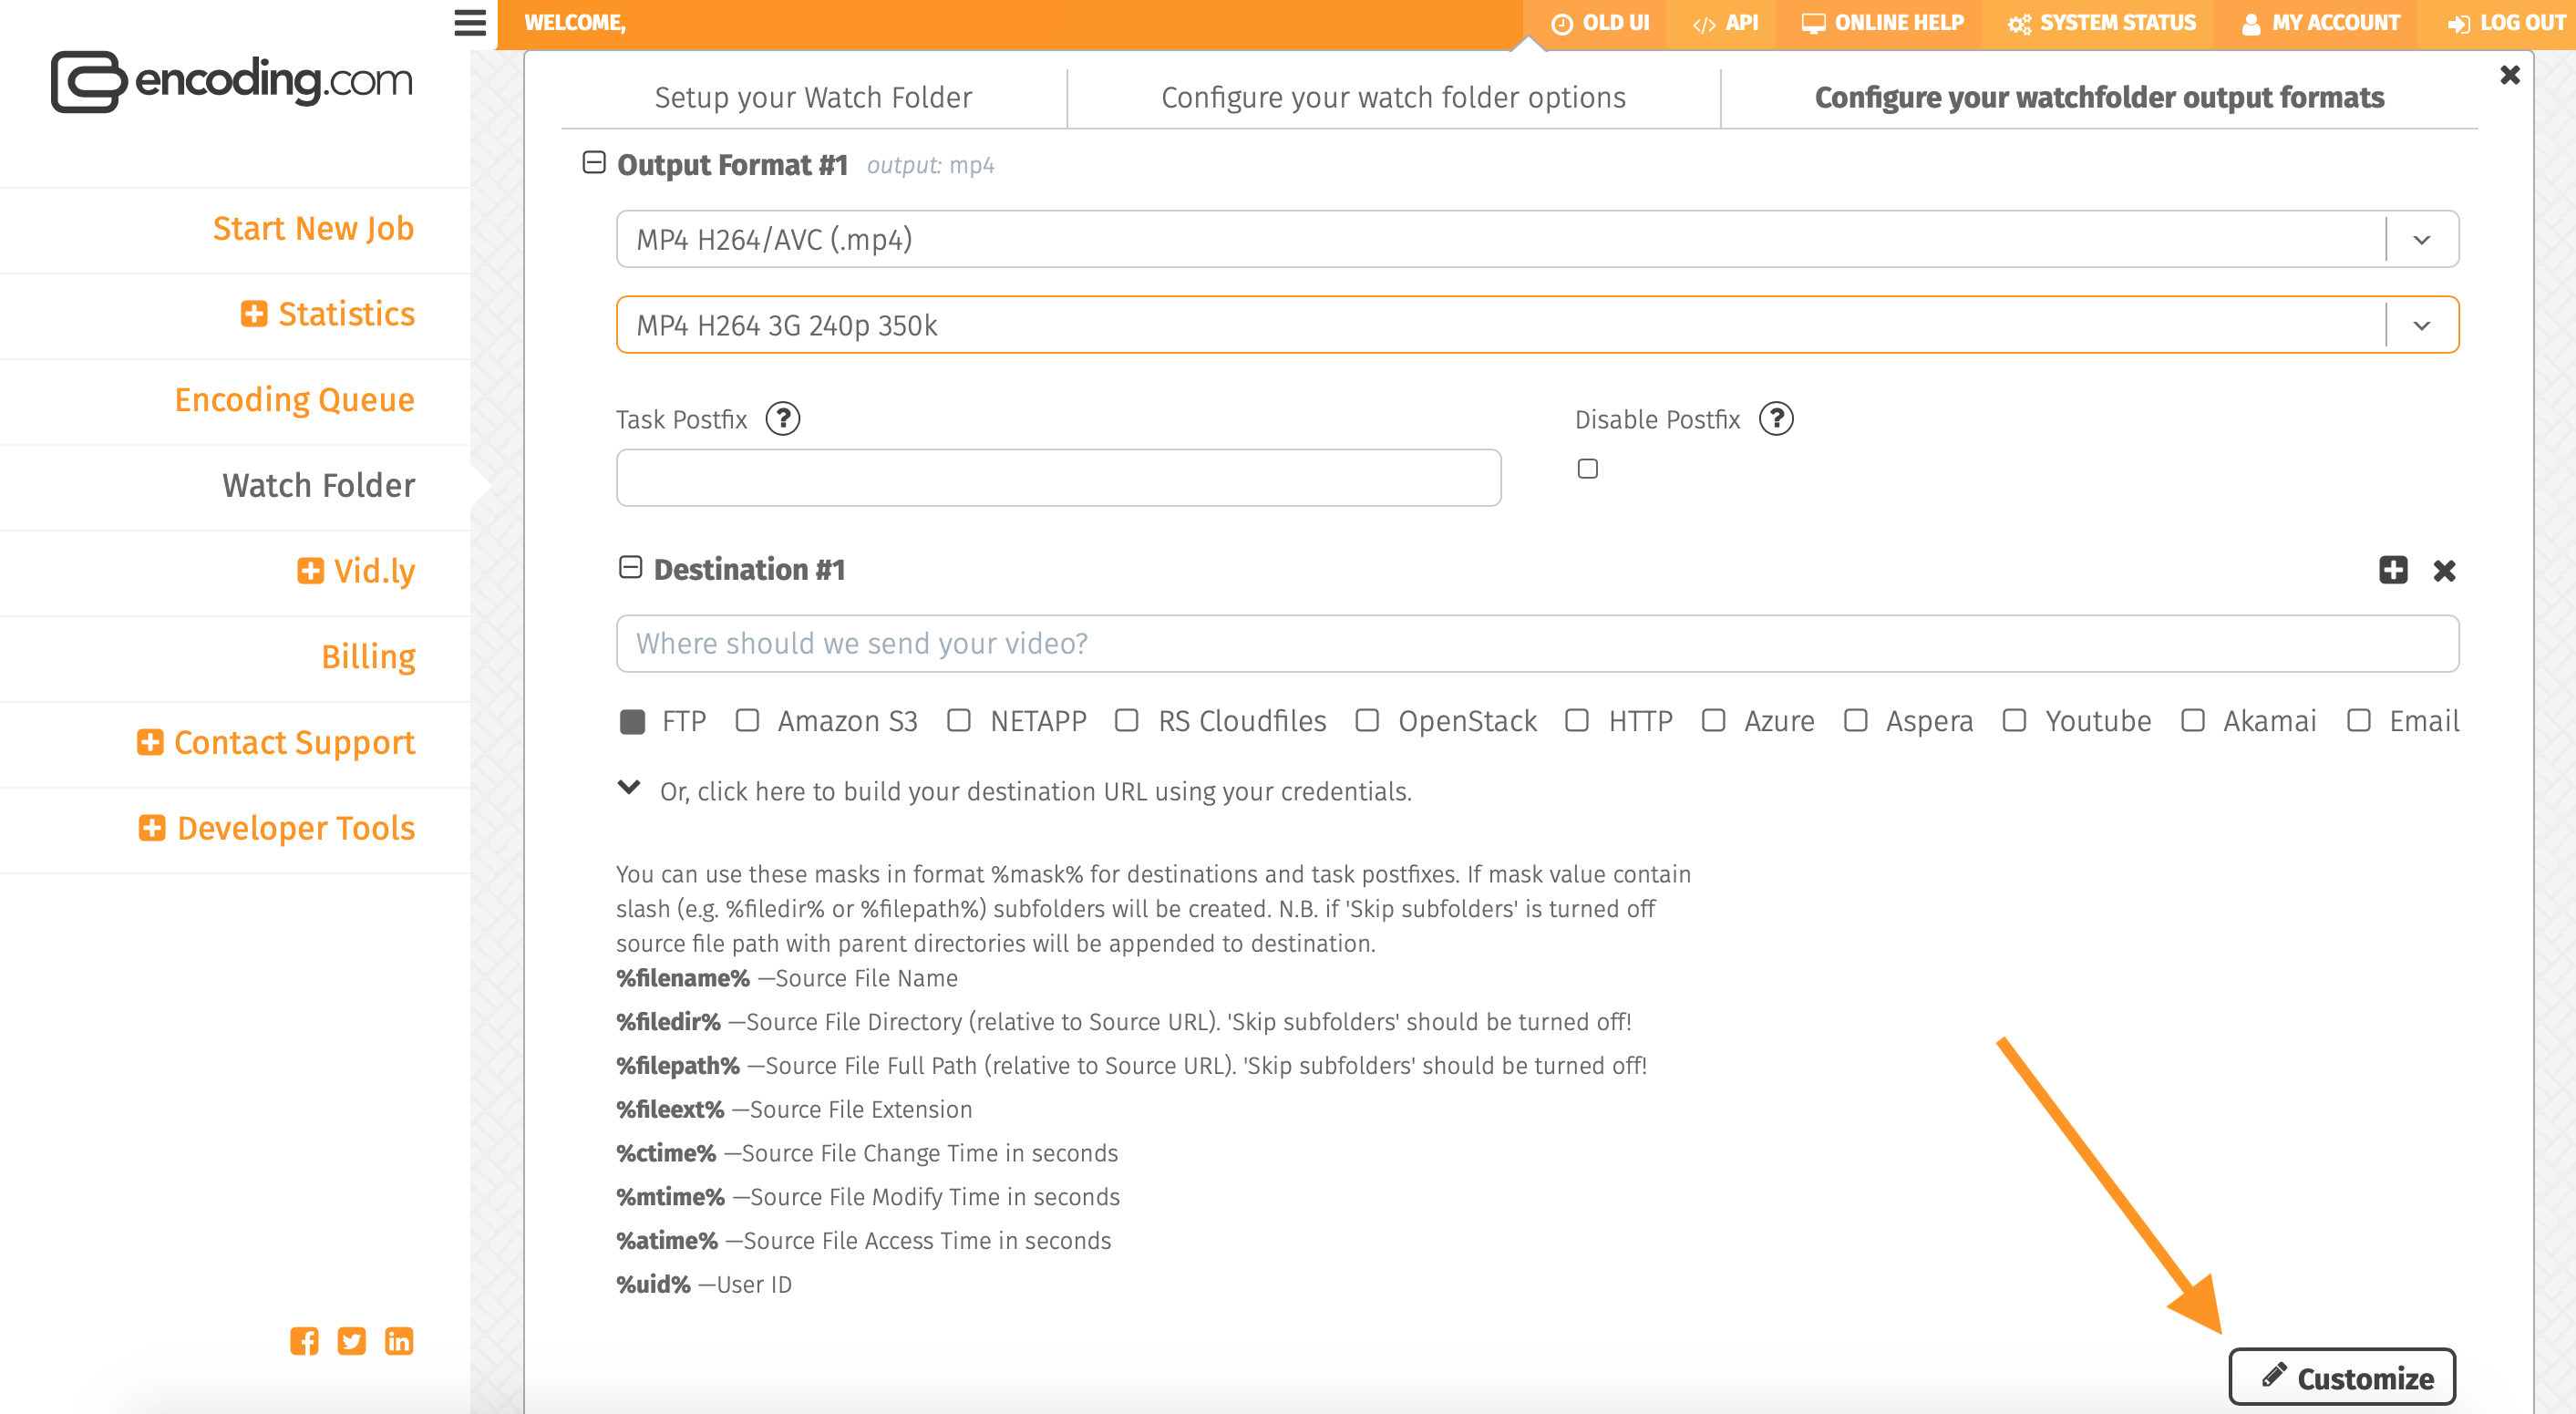
Upon choosing your output formats in the third tab, there are a few more options you can set for your outputs. Specifically, the "Task Postfix" option or "Disable Postfix" for the output. For Task Postfix you can set postfix to add to result file name. For example, if prefix is 'big' and file names is 'file.ext' result will be 'file_big.ext'. In order to add task number in prefix add sign '#' to prefix value e.g. '_big#'. Leave this field empty to use default settings. For Disable Postfix this option will disable task id automatically appending to result filename.
While you've set a destination in the second tab of the Watch Folder set-up, should you want to send your output to an additional output location, you can use the Destination field in the third tab to set the additional destination(s) of where the output should be delivered. If you click the + symbol above this Destination field you can add more destinations of where the outputs should be sent.
For each output you choose in the third tab of the Watch Folder set-up, if you want to customize the specs for your output, just click on the "Customize" button under the Output Format to meet your transcoding requirements.
If you would like an additional output created from the same source file ingested by the Watch Folder, just click the + symbol next to "Add Another Output Format". This will generate another Output Format dropdown for you to choose the additional output file format. All outputs will be processed in parallel.
Finally, once you've set-up your Watch Folder with all desired output destination(s) and output format(s), click the "Save" button at the bottom of the third tab in the set-up window and this will apply all configurations you have set in the Watch Folder set-up.
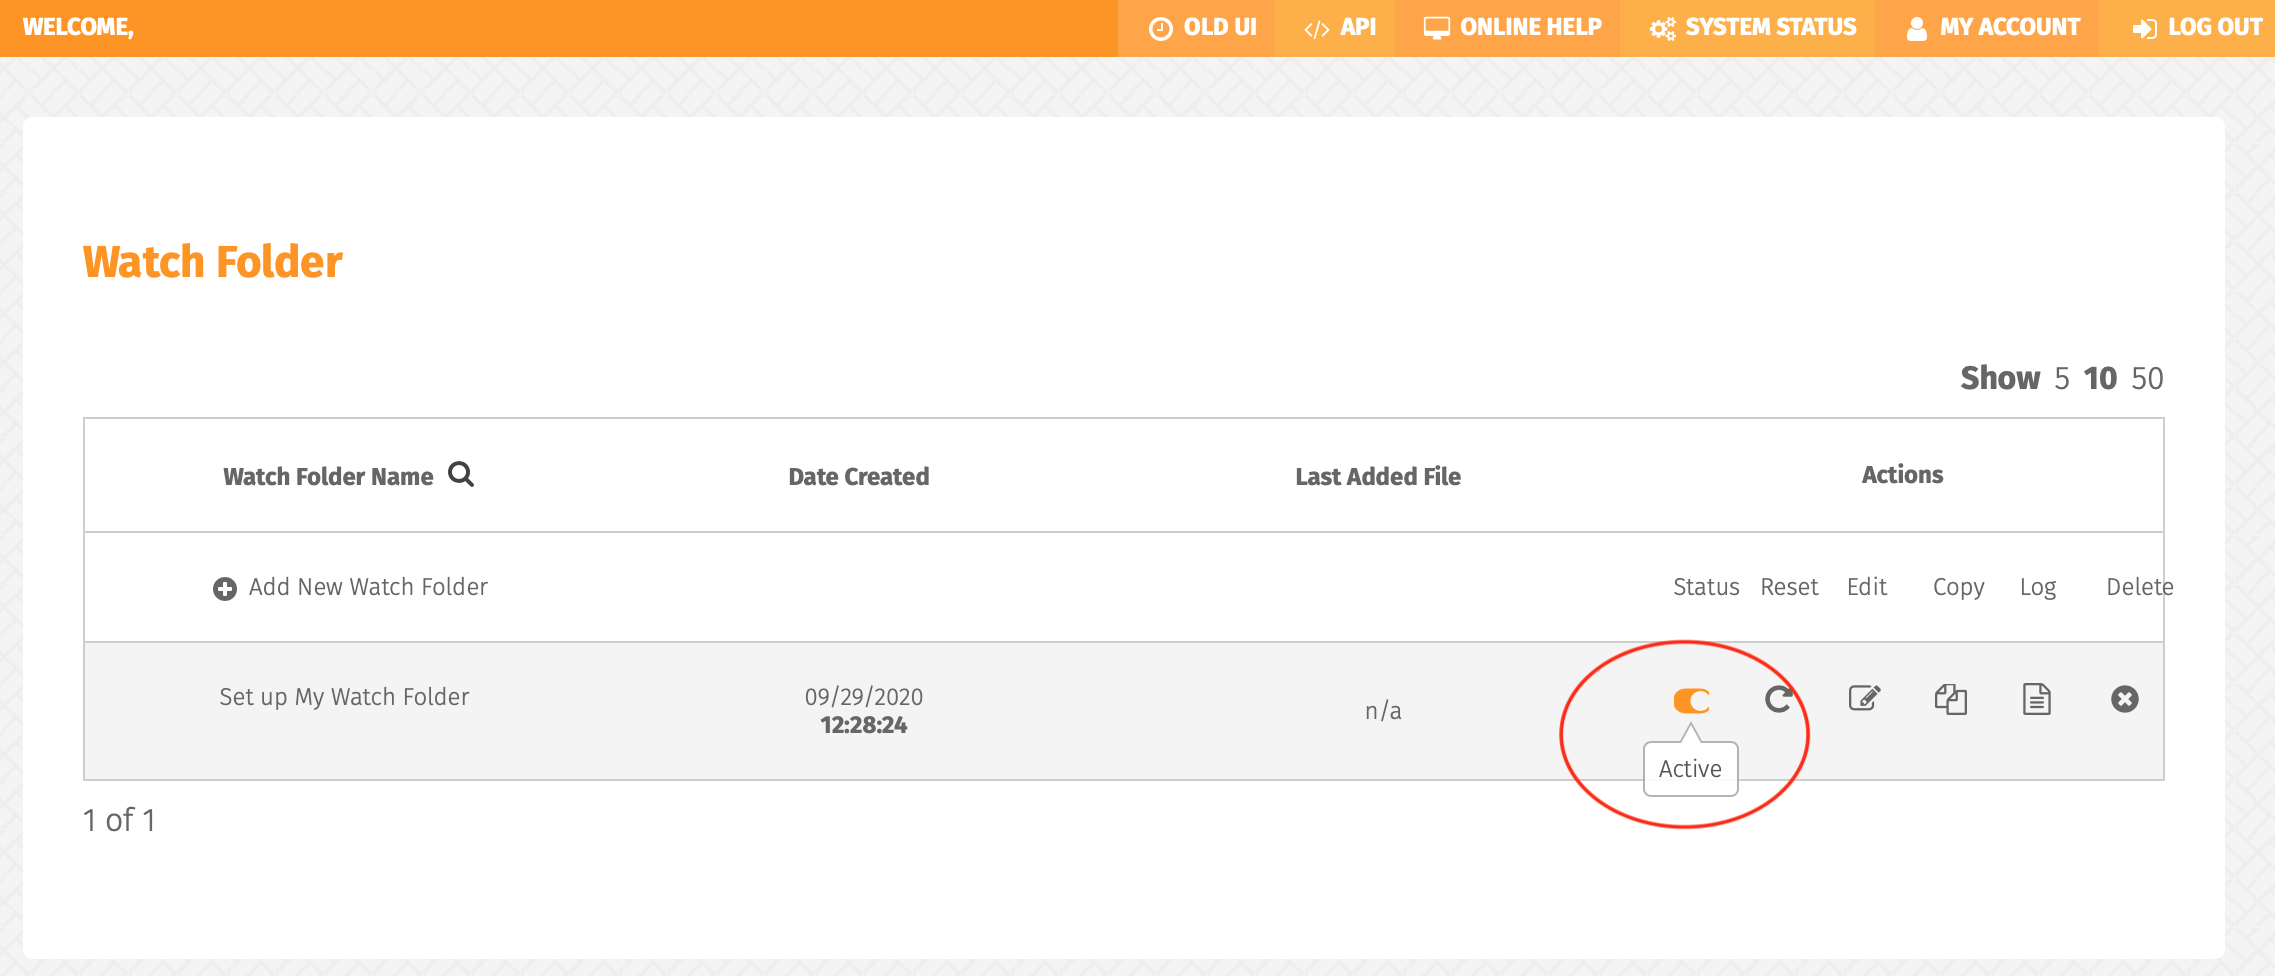
When the Watch Folder has been saved this will take you back to the Watch Folder page where you will be able to see the new Watch Folder you've just created. To the right of the name of the Watch Folder, tick the "Status" switch from inactive over to active. When the Watch Folder has been set to Active the Watch Folder will start looking in the source directory for files to process.
More Watch Folder Actions
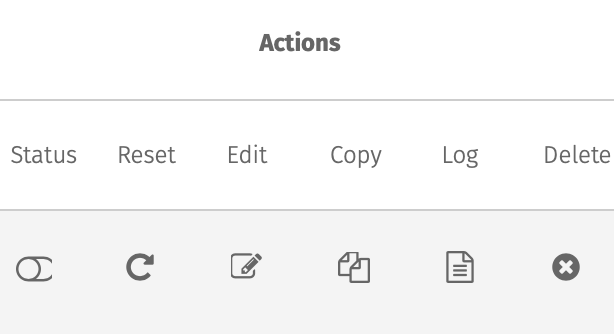
Next to the Status switch you will see a Reset option. By clicking the reset icon, this will reset the Watch Folder. Keep in mind, if files have previously been processed by the Watch Folder, and still reside in the source directory the Watch Folder is watching, hitting Reset will reprocess all previously processed files. Should the Watch Folder need to be reset for any reason, we recommend clearing out previously processed source files from the source location. This will also be the case if the Watch Folder is switched from Inactive back to Active at any time.
Need to make changes to the Watch Folder? No problem, just hit the Edit icon to update your Watch Folder as needed. After applying all the necessary changes, click Save and the Watch Folder will update with the most recent settings applied.
Too many steps to create a new Watch Folder? Just click the Copy icon and that will copy your Watch Folder settings over to the new Watch Folder you need. From there, simply edit the copied Watch Folder with the needed settings for processing and delivery.
Curious to see the Watch Folder log? Go ahead and click the Log button to view the activity for that particular Watch Folder.
Don't need that Watch Folder anymore? You can click the Delete icon to purge the Watch Folder from your account. This is a permanent deletion and the Watch Folder cannot be recovered if you choose to delete your Watch Folder.
Updated 15 days ago