Application Configuration
Step 1. Create Okta OIDC Application
NoteYou need an app administrator rights in your Okta Dashboard to have an ability to set up the OIDC application.
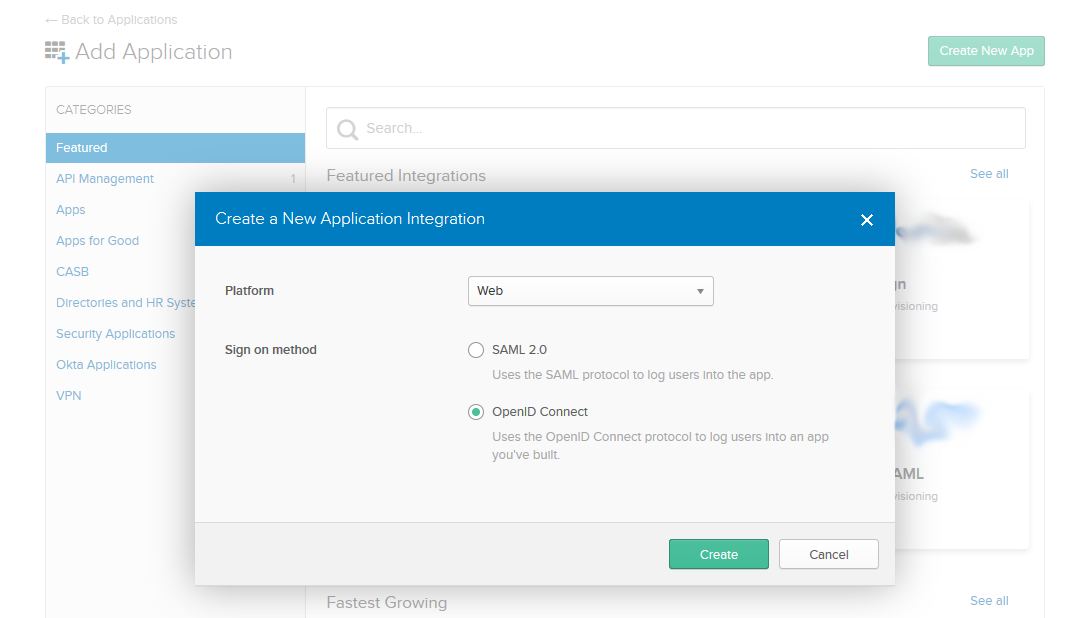
Go to the Application Directory in your Okta Dashboard and click on the "Create New App" button. In the dialog window select Web platform and OpenID Connect Sign-on method.
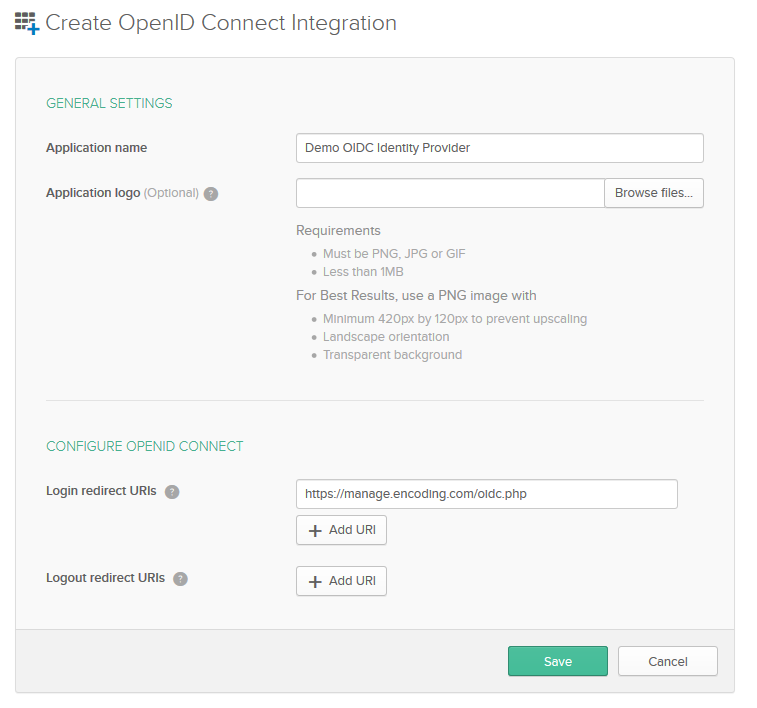
Name the new OIDC application and add : https://manage.encoding.com/oidc.php in the Login redirect URI field.
Step 2. Okta OIDC Application Configuration
Open your OIDC Application page and go to the "General" tab.
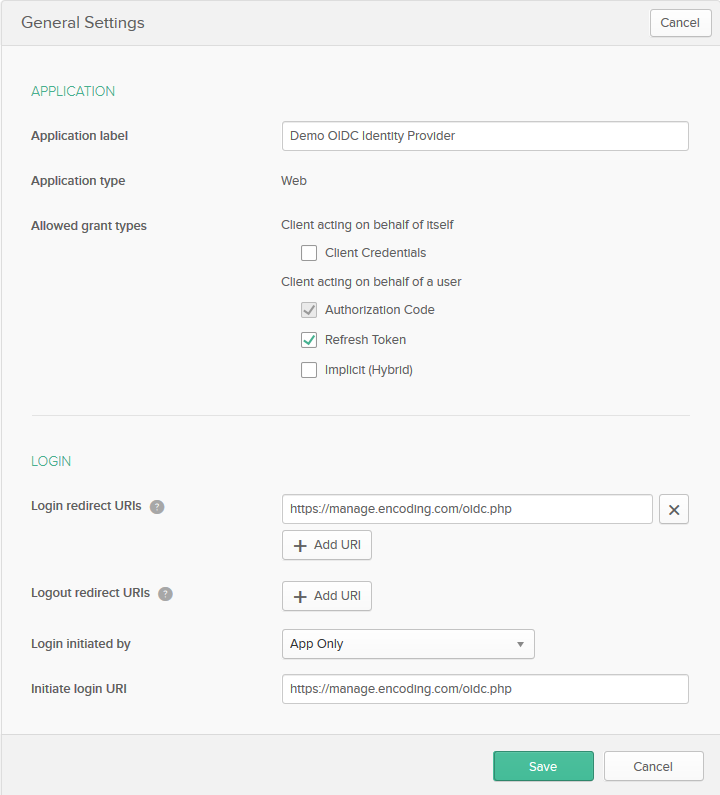
Next click on the "edit" button in the "General Settings" section.
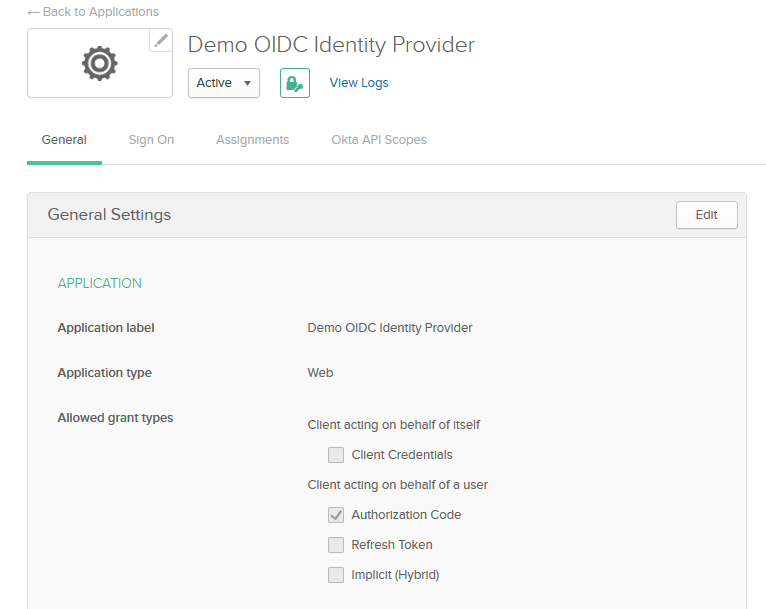
Check that the "Refresh Token" grant type is allowed and https://manage.encoding.com/oidc.php listed in the Login redirect URIs list.
Step 3. OIDC Credentials
Open your OIDC Application page and go to the "General" tab.
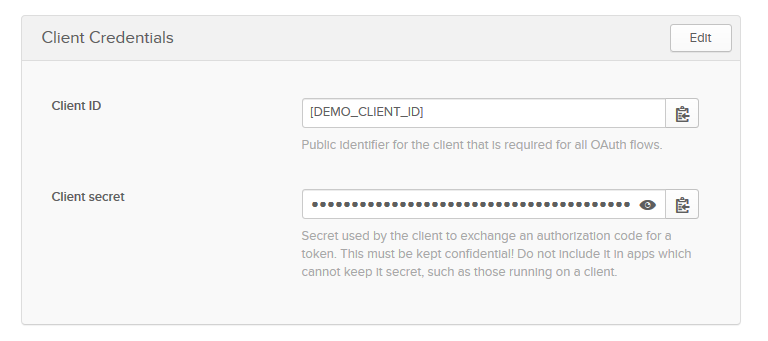
Find "Client Credentials" section and copy values of "Client ID" and "Client secret" fields.
Updated 8 days ago