Final Set Up
When you successfully link the SAML Application with your Encoding.com account you need to perform a few final steps to make an integration complete.
Step 1.
Navigate to the "My Account" tab within the User Interface and find added SAML integration.
You'll need to find Entity URI and copy it.
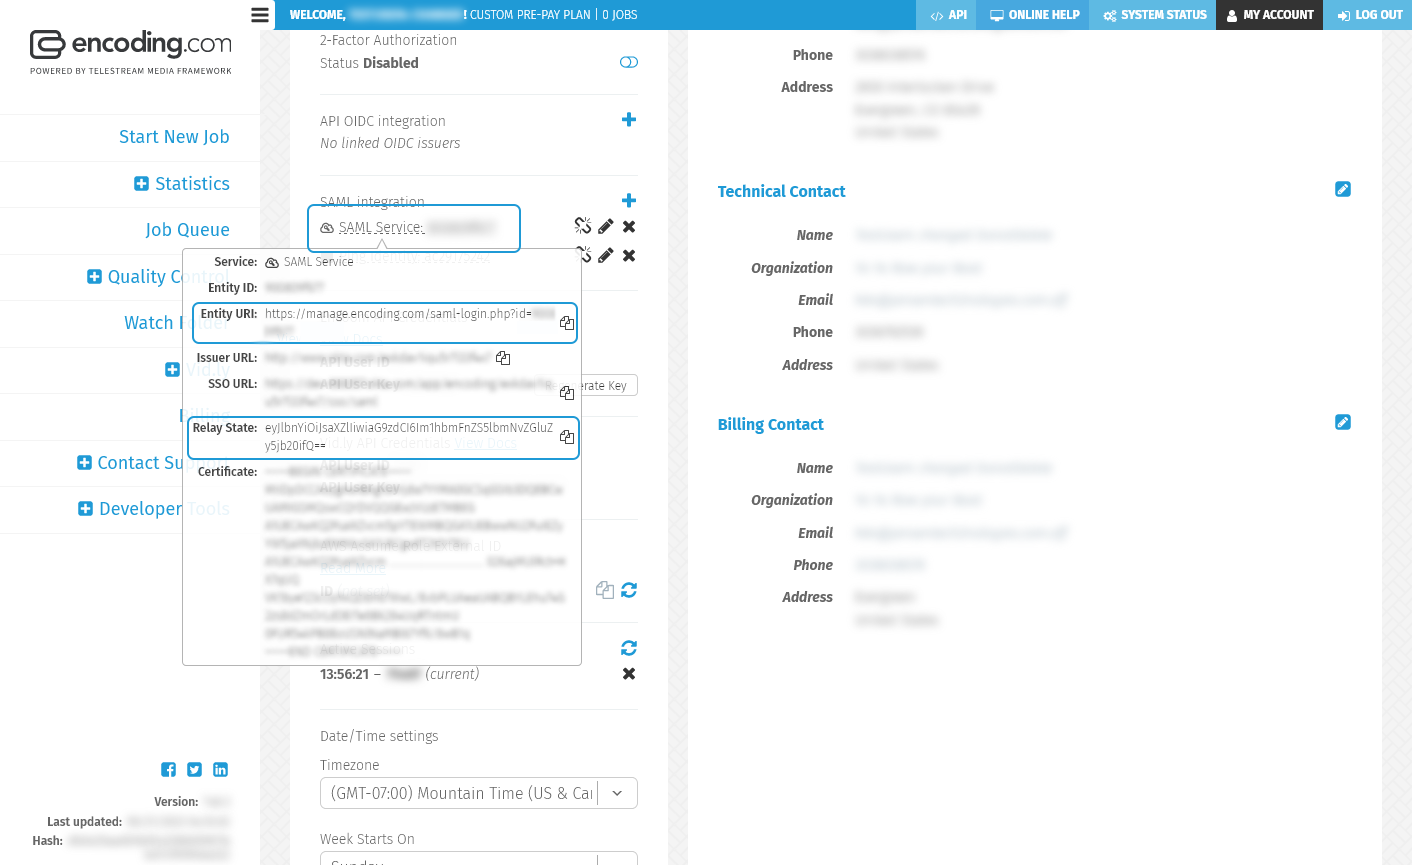
Also it may be necessary to copy "Relay State" value. It's strictly required if you're using Single Tenant Environment.
For different identity providers this parameter called different:
- Okta: "Default Relay State"
- Ping Identity: "TARGET APPLICATION URL"
Step 2.
Okta
Go to the Okta Application "Sign On" settings and click on the "Edit" button.

In the opened form fill these fields with values from the SAML integration properties:
- Default Relay State (optional) : "Relay State"
- Audience URI (required) : "Entity URI"
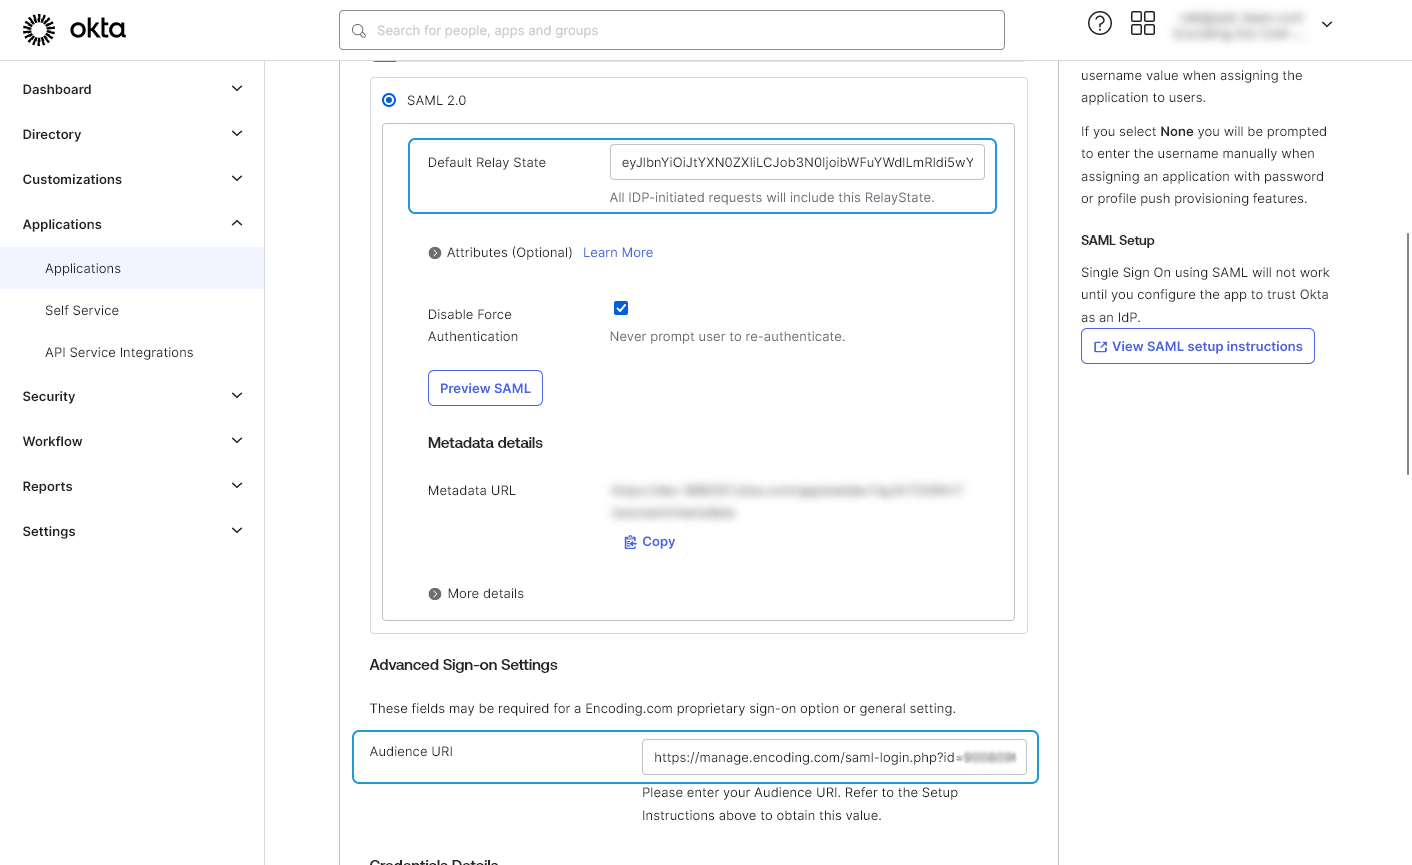
Submit settings and now it's all done.
Ping Identity
Switch to the "Configuration" tab of the Ping Identity Application details and click on the "Edit" button.
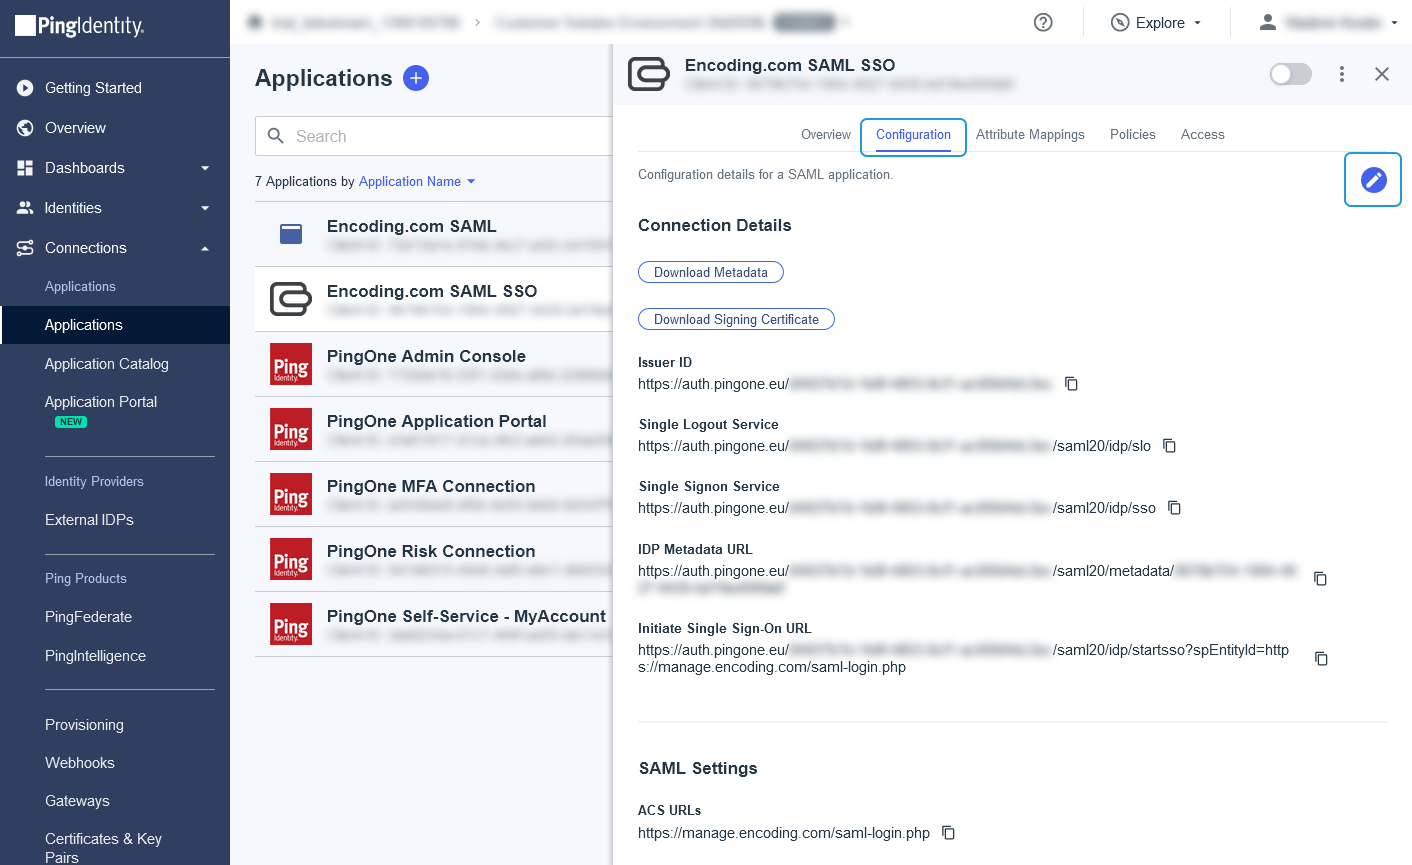
In the opened form fill these fields with values from the SAML integration properties:
- TARGET APPLICATION URL (optional) : "Relay State"
- ENTITY ID (required) : "Entity URI"

Submit settings and now it's all done.
Updated over 1 year ago